
Your project involves installing a small concrete slabs Melbourne yourself and you want to DIY. But where should you begin?
Start by driving stakes into the corners of your new slab area and stringing mason’s line between them to level it out. Remove enough soil for a gravel base beneath your concrete.
Level the Site
An asphalt or concrete slab provides the essential base of any project. Before undertaking anything else, however, your site needs to be leveled. Depending on the scope and size of your endeavor, this could take anywhere between one and two days. Similarly, prior to excavation work beginning it’s wise to reach out to local utility companies so as not to accidentally hit their lines while excavating.
Once your ground is ready for compacting, use a hand tamper to compact it firmly. Renting a mechanical compactor may be overkill in this instance – just ensure the soil is firmly packed without loose dust particles remaining.
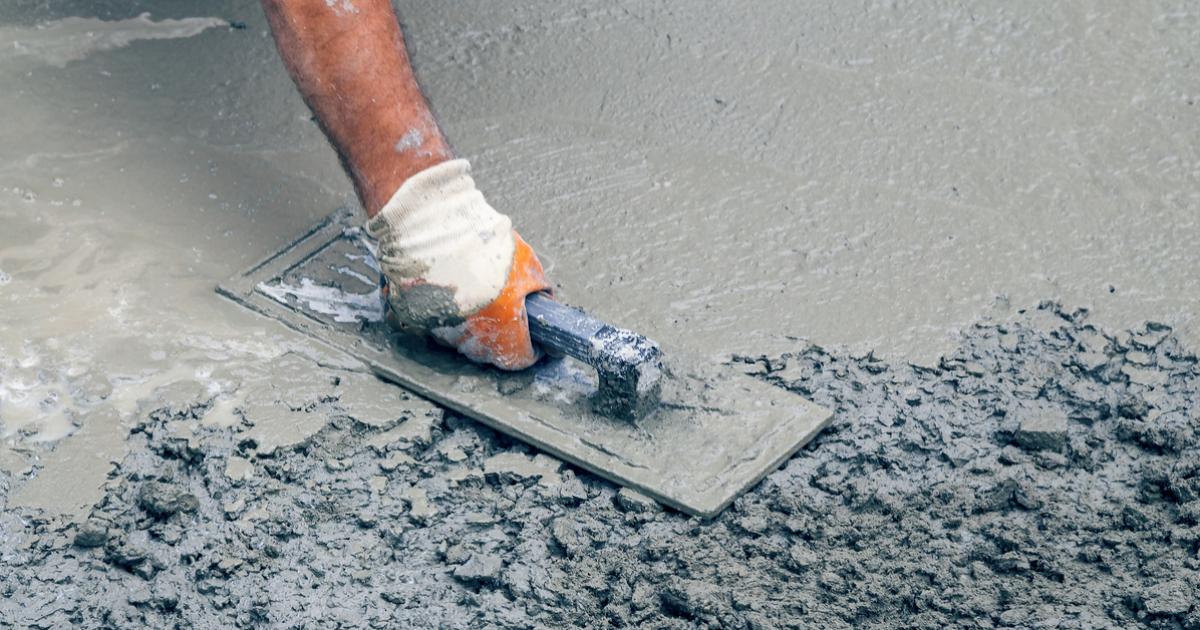
Utilize a bull float to smooth away any marks left by screeding and to help the cream-colored gravel-free concrete rise to the surface. While this requires some elbow grease, this helps ensure an even slab. After it bleeds a bit and hardens, use a magnesium hand float to complete its appearance – finishing will ensure its professional appearance and lasting durability.
Cut the Form Boards
Working concrete by hand requires strength and organization; to save both time and money when using a ready-mix, crack-resistant mix available from home centers.
As soon as your form boards have been placed in their final positions, pour the concrete. Mix two 80-lb bags of concrete mix in a wheelbarrow using approximately three quarts of water per bag until the mixture resembles thick cake batter. Add it gradually to the concrete form until about half full.
Adjust or screed the wet concrete as necessary. Screeding involves using a long plank of wood called a “screed board” to move over its surface immediately following mixing, for optimal results.
Drive stakes into each corner of the new slab area. Stretch a mason’s line between these stakes to mark out your desired length on one long side form board, cut it to size, nail it onto its first corner stake and brace it with 2x4s every two feet for levelling and bracing purposes.
Brace the Forms
When pouring a slab without bracing, the cement can often push your form boards out of shape, making future repairs challenging when wet concrete sets up. To prevent this from happening, lay a grid of reinforcing rebar around its perimeter – cut and bend pieces so they encase every corner, then splice them together by overlapping at least six inches and wrapping tie wire around intersections for added support – wire them to stakes set about four feet from your forms for more support.
Extend a mason line directly above the top edge of your 2×12. Align it with the string and brace it with pairs of 2x4s every two feet to absorb shock when nailing stakes or boards; to facilitate ease of nailing use a sledge hammer when nailing boards behind stakes with form boards as a shock-absorption method; kickers can be placed every two feet.
Pour the Concrete
Once your site has been properly leveled and prepared with form boards, it’s time to pour the concrete. Plan ahead and order enough concrete; it is always better to have extra than needed rather than run short halfway through your project. Utilize a concrete calculator in order to estimate how much concrete will be required.
Once you are ready to start pouring concrete, make sure you check the weather forecast. Pouring on an overly warm or rainy day could significantly weaken its strength, potentially jeopardizing its durability.
Screeding (also called screeding) involves using a 2-by-4 screed board with straight sides, to level newly poured concrete surfaces by pulling it across them with string lines, until your concrete is level and smooth. Use multiple passes until this step has been completed until all excess water has returned back into the mix; once this step has completed, allow several minutes to pass before pushing a bull float over its surface to smooth and flatten it further.